 Save to Pinterest
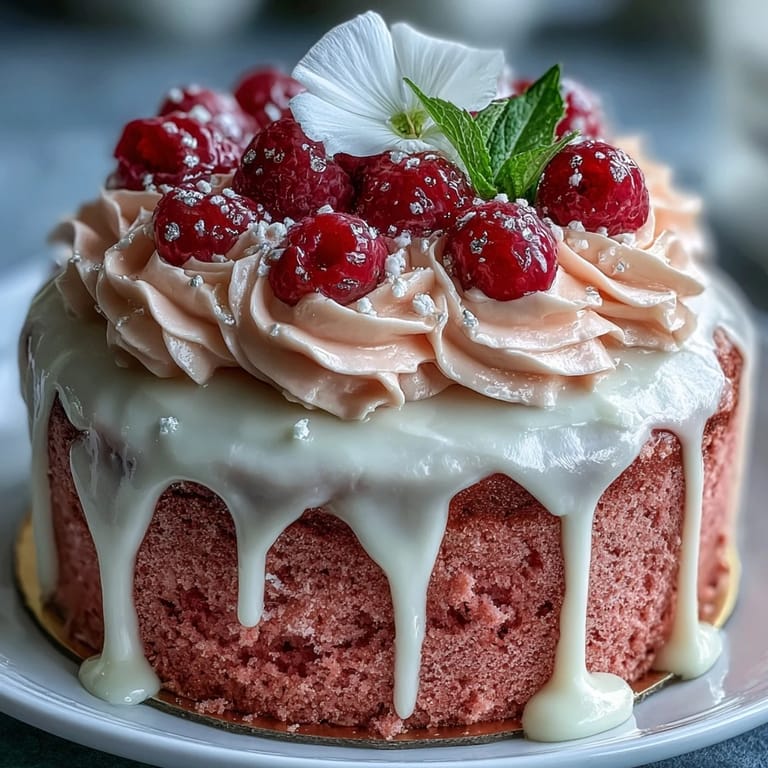
 The smell of rosé mingling with the sweetness of cake batter always catches me by surprise—something subtly celebratory about it even on a regular Wednesday. The first time I baked this Rosé Velvet Cake, a thunderstorm rattled outside while my kitchen filled with a warm, floral aroma. I remember pausing to taste the batter just a little too often, watching the pink hue deepen with each swirl of gel coloring. There’s a scientific pleasure in whisking wine into cake and watching it turn into something velvet-smooth. And honestly, few desserts cause as many gasps when presented, especially once the gold drip shimmers in the light.
We made this at my best friend’s bridal shower—the laughter, gold-dusted fingers, and cake crumbs everywhere linger in my mind more vividly than any posed photos. Slicing into the first frosted layer, someone asked if it was too pretty to eat, but the answer was clear once the plates came out: gone in minutes. I had never fielded so many recipe requests in a single afternoon. That cake raised the party from sweet to unforgettable. Sometimes, baking really is the main event.
Ingredients
- All-purpose flour: Gives the cake its structure, but be sure to spoon and level—you don’t want a dense crumb.
- Granulated sugar: Sweetens the cake and helps the exterior brown gently; I always give mine a quick whisk to prevent clumps.
- Baking soda & Baking powder: The dynamic duo for rise, especially important with a liquid like wine in the mix.
- Salt: Just enough to balance the sweetness and highlight the rosé notes—don’t skip it.
- Unsweetened cocoa powder: Adds subtle depth and makes the pink color sing; sifting removes any lumps.
- Unsalted butter: Room temperature is key; cold butter won’t cream and warm butter melts the sugar.
- Buttermilk: Tangs up the batter and keeps the cake tender; it really is worth bringing to room temp.
- Rosé wine: Choose one you’d actually drink—the flavor does peek through in the end!
- Eggs: Should be at room temperature for the fluffiest, most uniform batter.
- Vanilla extract: Backs up the rosé, giving a round, aromatic finish to every bite.
- White vinegar: A little acid keeps the crumb extra vibrant and soft—just a splash.
- Pink food coloring gel: Gel is best for bold color without thinning your batter; add gradually for your perfect blush.
- Cream cheese: Frosting’s tangy base, and softening it removes lumps for a silkier spread.
- Powdered sugar: Sift for a dreamy, lump-free frosting every time.
- Heavy cream: Makes your gold drip silky; cool it just enough before pouring.
- White chocolate chips: Melt smoothly and create a gentle canvas for the gold.
- Edible gold luster dust and vodka/clear extract: The gilded finishing touch—paint with a steady hand and a smile.
- Edible flowers, gold leaf or berries: Purely optional, but they always get a wow when scattered at the end.
Tired of Takeout? 🥡
Get 10 meals you can make faster than delivery arrives. Seriously.
One email. No spam. Unsubscribe anytime.
Instructions
- Prep the pans and oven:
- Start by setting your oven to 350 F (175 C), then butter three 8-inch pans and line them with parchment so you can lift the cakes out in one piece. There is a quiet satisfaction in lining pans just right—no stuck edges at the big reveal.
- Mix your dry ingredients:
- In a medium bowl, gently sift together the flour, cocoa, baking soda, baking powder, and salt until they’re one happy soft cloud. Sifting ensures the cocoa won’t surprise you with bitter streaks later on.
- Cream butter and sugar:
- In your largest mixing bowl, beat softened butter and granulated sugar together at medium speed until fluffy and a little pale—it’ll almost look whipped. Pause to scrape down the sides with a spatula; this is when it starts smelling sweet and buttery.
- Add eggs and vanilla:
- Drop in the eggs one by one, beating well and scraping the bowl after each addition, then pour in the vanilla. The batter should look glossy and dynamic, almost like it’s promising a good crumb.
- Incorporate buttermilk, rosé, and vinegar:
- Mix in the buttermilk, rosé wine, and vinegar, taking it slow so nothing splashes—expect a delicate, bubbly sound. The scent is floral and tangy at once, and the color will be very pale at this stage.
- Add the dry ingredients:
- Gradually add your sifted dry mix, beating just until combined—swirl in pink gel coloring a bit at a time until it’s the shade you like. Don’t overmix or you’ll lose that velvet softness!
- Bake:
- Divide batter among the 3 prepared pans, smoothing the tops gently. Bake for 30-35 minutes; your kitchen will start to fill with the scent of chocolate and wine before the timer dings.
- Cool the cakes:
- Let the cakes sit in their pans for 10 minutes, then flip them onto wire racks to finish cooling—resist the urge to frost while warm. The wait makes slicing and layering much easier.
- Prepare rosé cream cheese frosting:
- Beat softened butter and cream cheese together until silky, gradually adding sifted powdered sugar and then whisking in rosé, vanilla, and a pinch of salt. Taste and adjust—sometimes a splash more rosé brightens the whole thing.
- Assemble and frost:
- Trim cake domes if you’d like, then layer cake and frosting on your stand, repeating for all layers; apply a thin crumb coat and chill for 30 minutes. Frost fully, smoothing the sides with an offset spatula—imperfection just makes it look homemade.
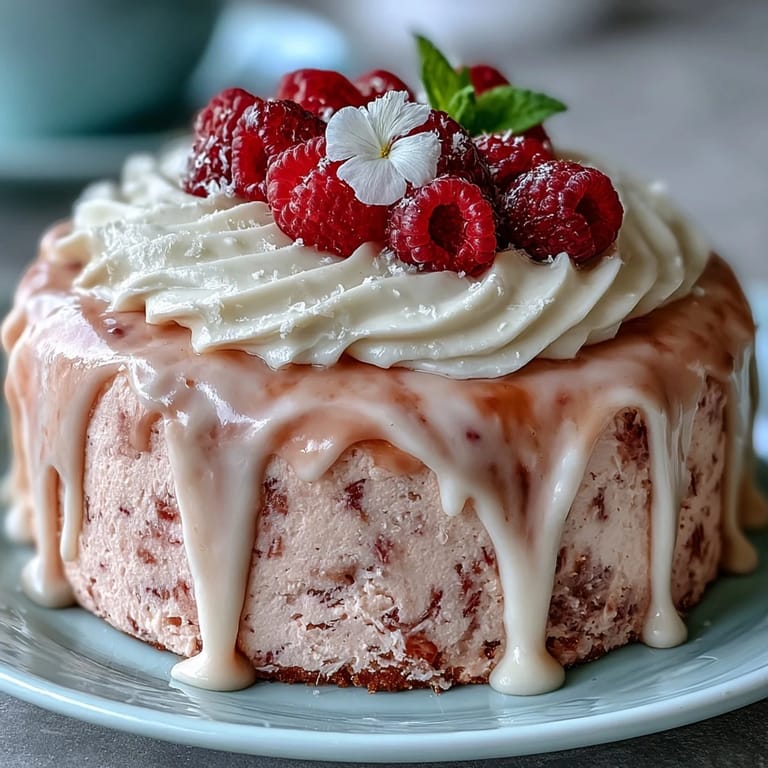
- Make and apply the gold drip:
- Microwave white chocolate chips and heavy cream in bursts, stirring to smooth and cooling until just pourable; drip around cake edges using a spoon or squeeze bottle. The white chocolate should gently cascade down the cake, not run fast.
- Brush on the gold:
- Mix edible gold dust with a little vodka or clear extract to create a liquid gold paint, then brush gently over the set drips for that magical metallic finish. Little flecks on your hands are a sign you did it right!
- Final chill:
- Let the cake chill at least 30 minutes before slicing to set everything beautifully. Then serve and watch it disappear—no leftovers needed.
 Save to Pinterest
  Save to Pinterest
 The first time I brushed gold onto this cake, my hands trembled—but by the time the last shimmer was in place, everyone around the table erupted in applause, not just for how it looked, but for how it tasted. Turns out, sometimes a cake brings a group closer than a toast ever could.
Decorating for the Occasion
Sprinkling edible flowers, berries, or gold leaf on top instantly sends this cake from pretty to breathtaking—even if your piping isn’t perfect. I’ve learned that letting friends help with the decorations means laughter is guaranteed and, honestly, the cake always ends up more beautiful than if I’d done it all myself.
Troubleshooting the Trickiest Parts
My first attempt at the gold drip was a leap of faith—it looked gloopy until I let it cool, then suddenly smoothed into luscious streams. If the frosting feels too soft before decorating, just pop it in the fridge for a quick chill and try again.
Serving and Storing with Style
The cake slices best after a good chill, so don’t skip that last step—plus, the flavors seem to deepen overnight. Stash leftovers in an airtight container in the fridge, and sneak a slice with coffee the next morning for a quietly extravagant treat.
- If you want a stronger rosé kick, brush a tablespoon over each cooled layer before frosting.
- A sparkling juice swap makes it just as festive and kid-friendly.
- Keep your food-safe brush just for gold so the finish is never dull.
 Save to Pinterest
  Save to Pinterest
 If you share this cake, you might just find yourself promising to bake it again—don’t be surprised if it becomes tradition. Every slice feels like a little celebration all its own.
Recipe FAQs
- → How do I boost the rosé flavor without soggy layers?
Brush cooled cake layers lightly with reserved rosé wine or fold a small amount into the frosting. Apply sparingly—use 1–2 tablespoons per layer—to keep crumb structure intact while enhancing the floral fruit notes.
- → What is a good non-alcoholic substitute for rosé?
Swap rosé with chilled sparkling white grape juice or diluted white grape juice (equal parts juice and water). Both add sweetness and aroma without alcohol and won't significantly alter batter texture.
- → How do I achieve an even blush color?
Add concentrated pink gel coloring a little at a time, mixing thoroughly between additions. Gel gives vibrant color without thinning the batter; stop when the desired blush is reached to avoid overmixing.
- → How can I prevent the white chocolate drip from running too far down the sides?
Cool the white chocolate ganache to room temperature so it’s fluid but not hot, and apply sparingly with a spoon or squeeze bottle. Chill the cake briefly after a thin drip layer to set before adding more if needed.
- → What’s the best way to store and serve the cake?
Keep the finished cake refrigerated, covered, and bring to cool-room temperature 30–60 minutes before serving for cream cheese frosting to soften slightly. Store leftovers up to 3 days for best texture.
- → Any tips for painting the gold finish safely?
Mix edible gold luster dust with a small amount of clear food-safe extract or vodka to make a paint. Use a clean, food-safe brush and apply thin layers, allowing each pass to dry to avoid smudging.