 Save to Pinterest
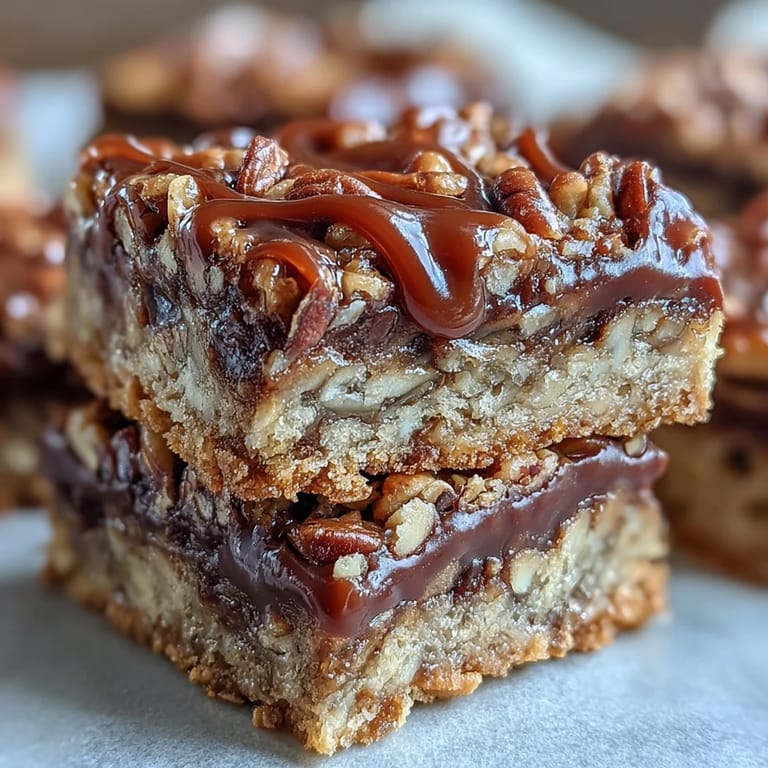
 The moment I pulled my first batch of turtle bars from the oven, the kitchen smelled like a candy shop had merged with a bakery. My husband wandered in, drawn by the scent of toasted pecans and bubbling caramel, and asked if I'd bought dessert instead of making it. That question became the highest compliment I've ever received for a homemade treat. These bars look bakery-perfect but come together with pantry staples and a little patience while the caramel does its magic.
I made these for a potluck once, and three people asked for the recipe before the night ended. One friend admitted she ate two bars on the drive home because she couldn't wait. There's something about the combination of chocolate, caramel, and that buttery crumble that makes people forget their manners. I've learned to double the batch now, because they vanish faster than anything else I bake.
Ingredients
- All-purpose flour: Forms the tender base of the crust and topping, binding the oats without making the bars cakey.
- Rolled oats: Old-fashioned oats work best here, they soften slightly while keeping a satisfying chew that quick oats can't deliver.
- Packed brown sugar: Adds moisture and a hint of molasses that deepens the caramel flavor throughout.
- Granulated sugar: Balances the brown sugar and helps the topping crisp up in the oven.
- Unsalted butter, melted: Melted butter blends easily into the crumb mixture and keeps the bars rich without being greasy.
- Salt: Just a pinch cuts through all that sweetness and makes every other flavor more distinct.
- Baking soda: A small amount helps the crust and topping brown evenly and develop a slight crispness.
- Semi-sweet chocolate chips: They melt just enough to create pockets of chocolate without turning into a solid layer.
- Chopped pecans: Toasting them in the oven brings out their natural oils and adds a buttery crunch.
- Caramel sauce: Store-bought works perfectly, but homemade caramel takes these bars to another level if you have the time.
- Heavy cream: Thins the caramel just enough so it spreads evenly and soaks into every corner.
Tired of Takeout? 🥡
Get 10 meals you can make faster than delivery arrives. Seriously.
One email. No spam. Unsubscribe anytime.
Instructions
- Prep the pan:
- Preheat your oven to 350°F and grease a 9x9-inch pan generously, or line it with parchment paper for easy lifting later. A well-prepped pan means clean edges and no wrestling with stuck bars.
- Mix the crumble:
- Combine flour, oats, both sugars, melted butter, salt, and baking soda in a large bowl, stirring until the mixture looks like wet sand with small clumps. It should hold together when you squeeze a handful but still feel crumbly.
- Form the crust:
- Set aside one cup of the crumble for topping, then press the rest firmly into the bottom of your pan with your fingers or the bottom of a measuring cup. An even layer means even baking and no thin spots that burn.
- Bake the base:
- Slide the crust into the oven for 10 minutes until it just starts to turn golden at the edges. This par-bake keeps the bottom from getting soggy once you add the caramel.
- Warm the caramel:
- While the crust bakes, heat caramel sauce and heavy cream in a small saucepan over medium-low heat, stirring constantly until smooth. The cream makes the caramel pourable and prevents it from hardening too quickly.
- Layer the fillings:
- Pull the crust from the oven and immediately sprinkle chocolate chips evenly across the warm surface, then scatter pecans over the chocolate. The residual heat will start softening the chocolate, which helps everything meld together.
- Pour the caramel:
- Drizzle the warm caramel sauce over the chocolate and pecans, aiming for even coverage but not stressing if it pools in spots. It will spread and settle as it bakes.
- Add the topping:
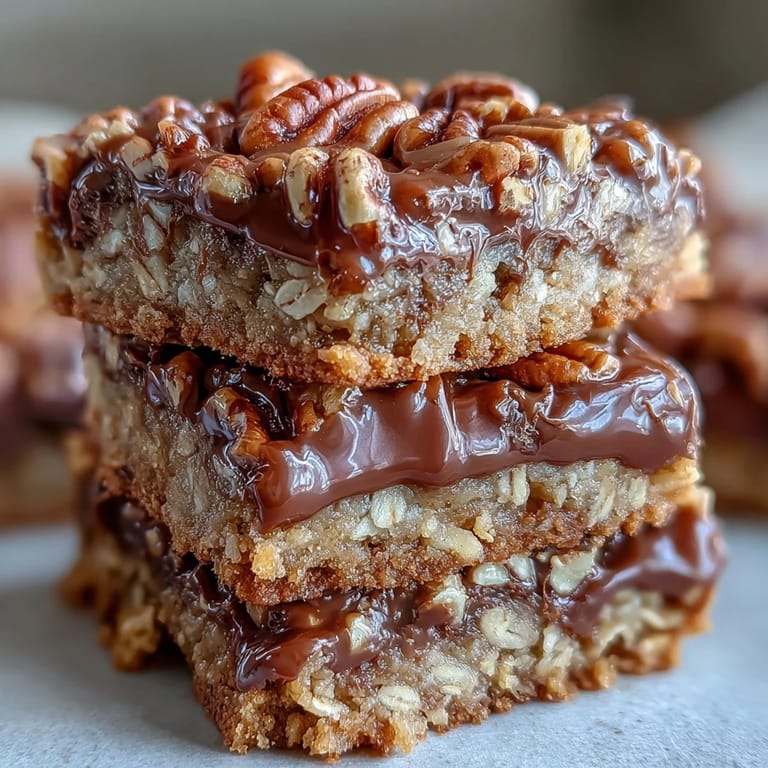
- Sprinkle that reserved cup of crumble over the caramel layer, covering as much surface as you can. This top layer will turn golden and crisp, creating the classic turtle bar look.
- Finish baking:
- Return the pan to the oven for 15 to 20 minutes, watching for the topping to turn a deep golden brown. The caramel will bubble up around the edges, which is exactly what you want.
- Cool completely:
- Let the bars cool in the pan on a wire rack for at least 30 minutes, or until they reach room temperature. Cutting them while warm results in gooey, messy squares that fall apart, so patience pays off here.
 Save to Pinterest
 My son once declared these better than any candy bar he'd ever had, which coming from a ten-year-old with a serious sweet tooth, felt like winning a baking award. He started asking me to pack them in his lunch, but they never made it past breakfast. Now I hide a few in the back of the fridge if I want any to survive the weekend.
Storing and Serving
These bars keep beautifully in an airtight container at room temperature for up to a week, though they rarely last that long. I layer them between sheets of parchment paper to prevent sticking, and sometimes I stash a few in the freezer for emergencies. Thaw them at room temperature for about 20 minutes, and they taste just as fresh as the day I baked them. For an extra touch, I drizzle melted chocolate over the cooled bars before serving, which makes them look fancy enough for guests but doesn't add much effort.
Flavor Variations
I've swapped pecans for walnuts when I ran out, and the bars turned out just as delicious with a slightly earthier flavor. Almonds work too, though I recommend chopping them finely so they distribute evenly. A friend of mine sprinkles flaky sea salt over the caramel before adding the crumb topping, and that salted caramel version has become her signature treat. You can also use dark chocolate chips if you prefer a less sweet, more intense chocolate flavor that contrasts beautifully with the caramel.
What You'll Need
A 9x9-inch baking pan is essential for the right thickness, any larger and the bars spread too thin and lose that chewy center. I use a sturdy mixing bowl for the crumble and a small saucepan with a heavy bottom to prevent the caramel from scorching. A wooden spoon or silicone spatula helps when stirring the caramel, and a wire rack ensures even cooling so the bottoms don't sweat. Finally, a sharp knife and a steady hand make slicing these into neat squares much easier.
- Let the bars cool completely before cutting, even if it feels like torture to wait.
- If the caramel hardens too much while you're working, rewarm it gently over low heat.
- Store leftovers in a cool spot, not the fridge, unless your kitchen is very warm.
 Save to Pinterest
 These turtle bars have become my go-to whenever I need something impressive that doesn't require fussy techniques or hard-to-find ingredients. Every bite delivers that perfect mix of chewy, crunchy, gooey, and rich that makes you reach for just one more square.
Recipe FAQs
- → Can I use homemade caramel sauce instead of store-bought?
Yes, homemade caramel sauce works beautifully in these bars. Just ensure it's smooth and pourable when combined with the heavy cream for even distribution over the chocolate and pecans.
- → How do I prevent the bars from sticking to the pan?
Line your 9x9-inch pan with parchment paper, leaving overhang on two sides. This allows you to lift the entire block out after cooling, making cutting into clean squares much easier.
- → Can I substitute the pecans with other nuts?
Absolutely. Walnuts, almonds, or even cashews work well. Toast them lightly before adding for enhanced flavor and crunch that complements the caramel and chocolate layers.
- → Why do the bars need to cool completely before cutting?
Cooling allows the caramel and chocolate to set properly, preventing messy cuts. Cutting while warm results in layers sliding apart and losing the distinct turtle bar appearance.
- → How should I store these bars to maintain freshness?
Store in an airtight container at room temperature for up to one week. Layer parchment paper between stacks to prevent sticking. For longer storage, freeze for up to three months.
- → Can I make these bars gluten-free?
Yes, substitute the all-purpose flour with a 1:1 gluten-free baking flour blend and use certified gluten-free oats. The texture remains chewy and delicious with this simple swap.