 Save to Pinterest
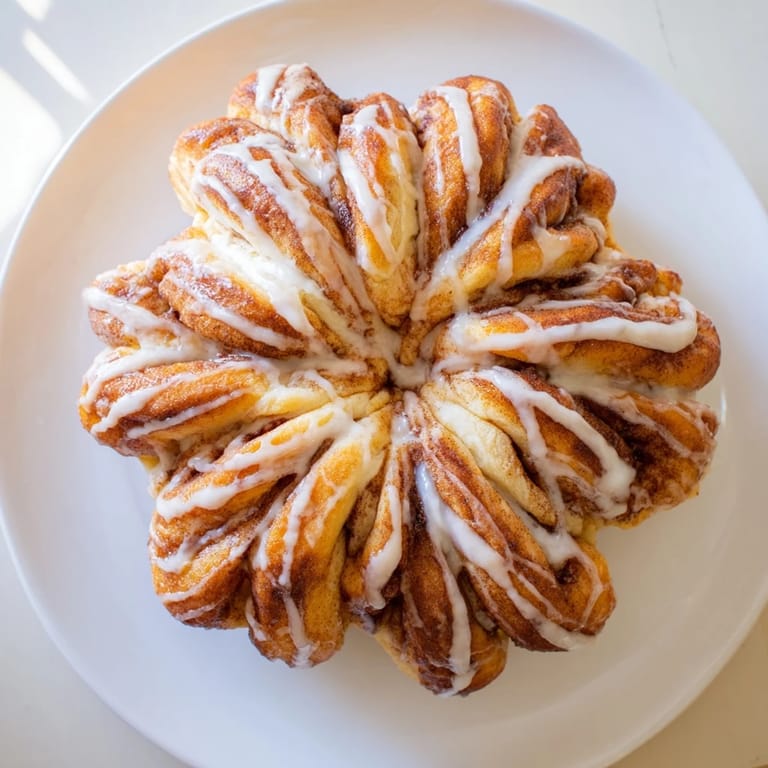
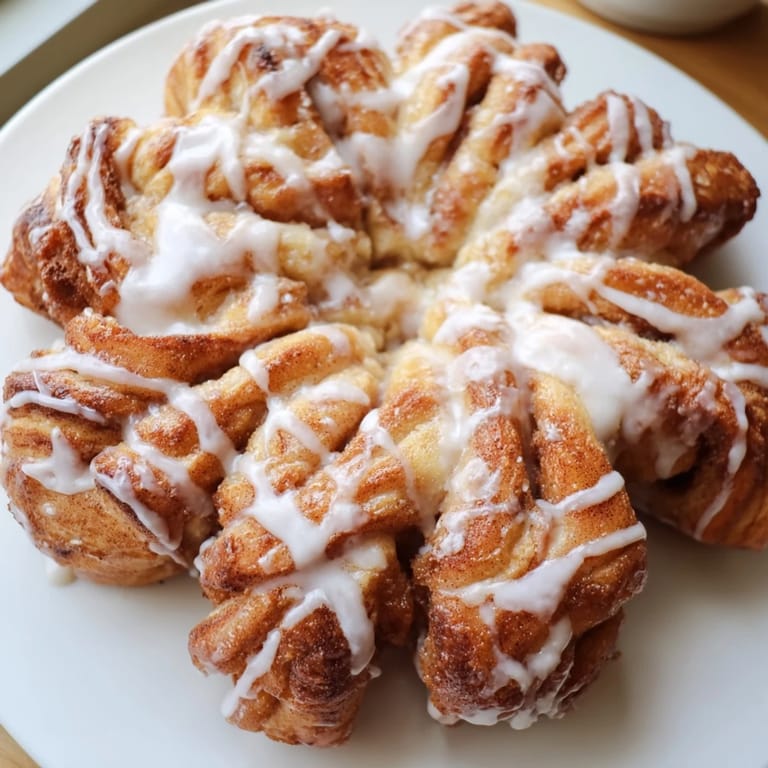
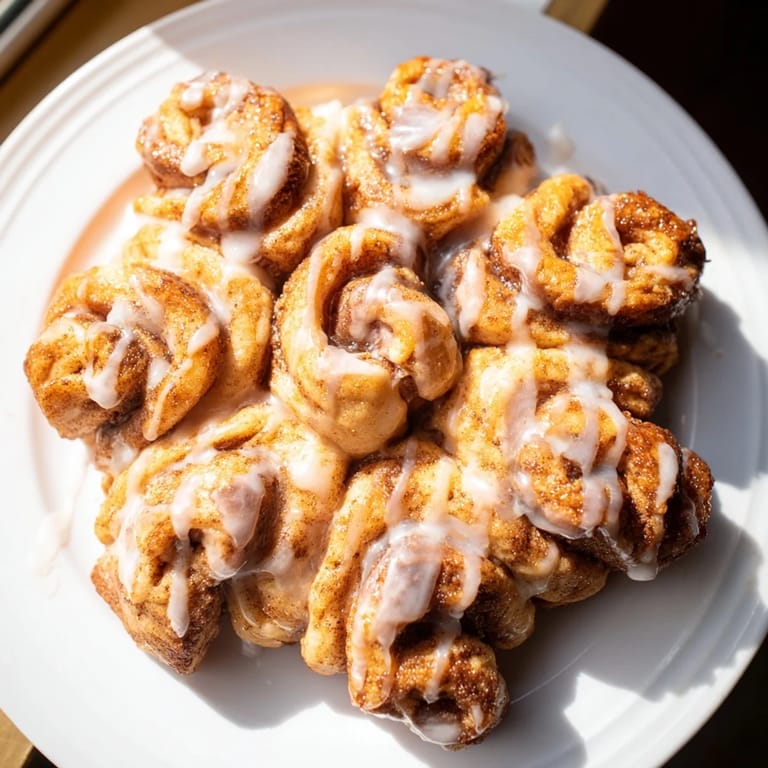
 My sister called at 6 AM on Christmas morning asking if I could bring something "show-stopping" to brunch. I had flour, butter, and way too much confidence, so I decided to make a cinnamon roll that looked like a snowflake. Three hours later, pulling apart those twisted golden spirals while everyone gasped was worth every moment of dough-covered chaos. This pull-apart snowflake became the unexpected centerpiece of our holiday table, and honestly, it's been requested every winter since.
There's something magical about watching people's faces when you bring out a dessert that's also a puzzle to eat. My dad couldn't decide if he should photograph it or eat it, so he did both, posting it online and getting asked for the recipe by friends I didn't even know he had. That's when I realized this wasn't just breakfast anymore—it was a conversation starter.
Ingredients
- All-purpose flour (3 1/4 cups): The foundation of everything; make sure it's not packed when you measure or your dough will be tough and stubborn.
- Active dry yeast (2 1/4 tsp): Room temperature milk is non-negotiable here—too hot kills the yeast, too cold and it won't wake up.
- Warm milk (3/4 cup): This hydrates the dough into something soft and pillowy; I learned to test it on my wrist like baby formula.
- Granulated sugar (1/4 cup): Feeds the yeast and starts the rise; it's like giving your dough permission to breathe.
- Unsalted butter (1/4 cup melted, plus 1/4 cup softened): The melted butter goes in the dough for richness, the softened butter is for spreading between layers without tearing.
- Egg (1 large, room temperature): Adds structure and golden color; cold eggs won't incorporate smoothly and you'll end up with streaky dough.
- Salt (1/2 tsp): Balances sweetness and strengthens the gluten network, even though it seems tiny.
- Packed light brown sugar (1/2 cup): This is the filling's secret—it's moister and more complex than granulated, so the swirls stay tender.
- Ground cinnamon (2 tsp): Use the good stuff; stale cinnamon tastes like cardboard and your whole effort suffers for it.
- Powdered sugar (1 cup): Mixed with just enough milk and vanilla to drizzle without being runny.
Tired of Takeout? 🥡
Get 10 meals you can make faster than delivery arrives. Seriously.
One email. No spam. Unsubscribe anytime.
Instructions
- Wake Up Your Yeast:
- Pour warm milk into a bowl with sugar and yeast, then wait. That frothy foam that appears is your signal that everything is alive and ready to work; if it doesn't happen, your yeast is dead and you need to start over.
- Build the Dough:
- Stir in butter, egg, and salt, then gradually add flour while mixing. You're looking for a shaggy, soft dough that comes together but isn't sticky—this takes patience and maybe 2 minutes of standing still to feel the texture.
- Knead Until Smooth:
- Flour your counter lightly and knead for 5–7 minutes, pushing with the heel of your hand and folding the dough back toward you. When it stops resisting and feels smooth and elastic, you're done; rushing this step means dense rolls later.
- Let It Rise:
- Grease a bowl, place the dough inside, cover it loosely with plastic wrap or a damp towel, and find a warm spot. One hour is about right, but a cold kitchen might take 90 minutes—you want it roughly doubled, not a specific timer.
- Roll Out Three Circles:
- Punch down the dough to deflate it, divide it into three equal pieces, and roll each into a 12-inch circle on a clean surface. Don't worry if they're not perfect circles; snowflakes aren't perfectly symmetrical anyway.
- Layer and Fill:
- Place the first circle on parchment paper, spread half the softened butter over it, then sprinkle half the cinnamon-sugar mixture evenly. Layer the second circle on top, add the remaining butter and cinnamon sugar, then crown it with the third circle—you've just made a delicious three-layer cake.
- Cut from the Center Out:
- Place a small glass in the middle (don't cut through the dough; the glass holds it in place) and use a sharp knife to cut 16 equal strips radiating outward like spokes. The glass stays until you're done twisting.
- Twist Into Snowflake Points:
- Take two adjacent strips and twist them away from each other twice in opposite directions, then pinch the ends together to seal. Repeat with all eight pairs—this is where the magic happens and why everyone will take a photo.
- Quick Final Rise:
- Remove the glass, cover the snowflake with a towel, and let it sit for 15 minutes. The dough relaxes and puffs slightly, making the baked rolls tender instead of dense.
- Bake Until Golden:
- Into a 350°F oven for 22–25 minutes; the top should turn deep golden brown and smell incredible. If your oven runs hot, check at 20 minutes—burned edges aren't the look we're going for.
- Cool and Drizzle:
- Let it rest for 10 minutes so the icing doesn't melt right off, then whisk together powdered sugar, milk, and vanilla until it's thin enough to drizzle. Pour it over the warm snowflake and watch it pool into the crevices.
 Save to Pinterest
 My nephew asked why we didn't make this every week, and I realized I'd never explained that it wasn't just food—it was a moment where everyone stopped scrolling and actually tasted something warm. That's when breakfast stopped being routine and became something we talk about.
Why Room Temperature Matters
Cold ingredients don't mix smoothly, and cold yeast won't rise evenly, but most people overlook this because they're rushing. I learned this the hard way when I pulled dough out of the fridge and wondered why it took three hours to rise instead of one. Now I pull the egg out 30 minutes before, warm the milk to exactly wrist temperature, and let the softened butter sit on the counter while I measure flour. It sounds fussy, but it's actually the difference between a snowflake that holds together and one that falls apart while twisting.
The Snowflake Design Trick
The glass in the center isn't just decorative; it's your anchor point that keeps the snowflake from becoming a shapeless spiral. Without it, your cuts will drift and your points won't be symmetrical. I've seen people try to cut freehand and regret it immediately. The glass also makes it easy to remove the center circle neatly, leaving a hole that looks intentional and pretty. Once you twist the strips, the whole thing becomes sturdy enough to move around—just support it gently when you transfer it to the oven.
Filling and Frosting Variations
Cinnamon sugar is the classic, but I've added chopped toasted pecans for texture, a pinch of cardamom for intrigue, and even a layer of cream cheese mixed into the softened butter when I'm feeling fancy. The icing should be thin enough to drizzle but thick enough to stay on top; if it runs everywhere, add more powdered sugar; if it won't pour, add milk one teaspoon at a time. For a boozy brunch version, I've swapped vanilla extract for rum or a hint of bourbon, and no one complained.
- Brown sugar holds moisture better than granulated, so your rolls stay tender for days instead of hardening by afternoon.
- Softened butter spreads without ripping the delicate dough, while cold butter tears it into frustrating little pieces.
- A perfectly poured icing is the finishing touch that makes people think you're more skilled than you actually are.
 Save to Pinterest
 This snowflake has become the dessert I make when I want people to feel like they're part of something special, something that took time and attention. Pull-apart style means everyone gets to destroy it together, and somehow that makes it taste even better.
Recipe FAQs
- → How do I shape the dough into the snowflake design?
After rolling the dough into layers, cut strips radiating from the center, then twist pairs of strips away from each other twice before pinching the ends to form points.
- → Can I substitute ingredients for a richer dough?
Yes, replacing half the milk with heavy cream will create a richer, more tender dough.
- → What is the best way to ensure the dough rises properly?
Keep the dough covered in a warm, draft-free area until it doubles in size, roughly about one hour.
- → How should I store leftovers to maintain freshness?
Wrap tightly and keep at room temperature for up to two days or refrigerate for longer freshness, then reheat before serving.
- → Can I add nuts or dried fruit to the filling?
Yes, toasted pecans or raisins can be added to the filling for extra texture and flavor.